まさにぃの折り紙コラム

折紙師範まさにぃのブログ。

半年越しの披露!神谷哲史バハムート、完成編/"Divine Dragon" has completed

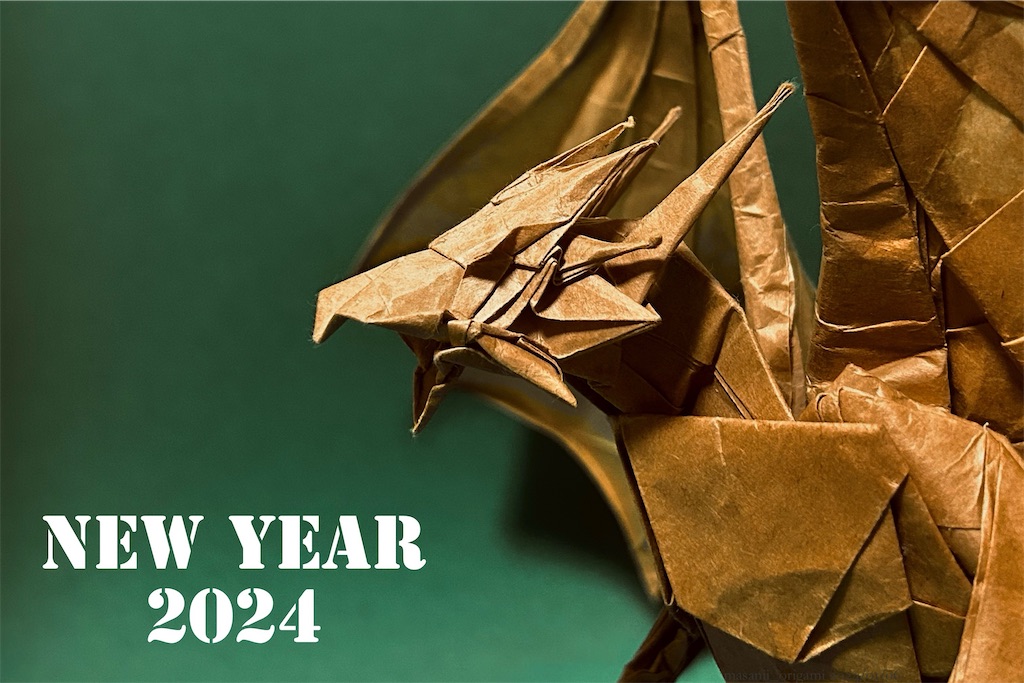
f:id:masanii_origami:20240106125244j:image

神谷哲史さんの「ディバインドラゴン(バハムート)」です!
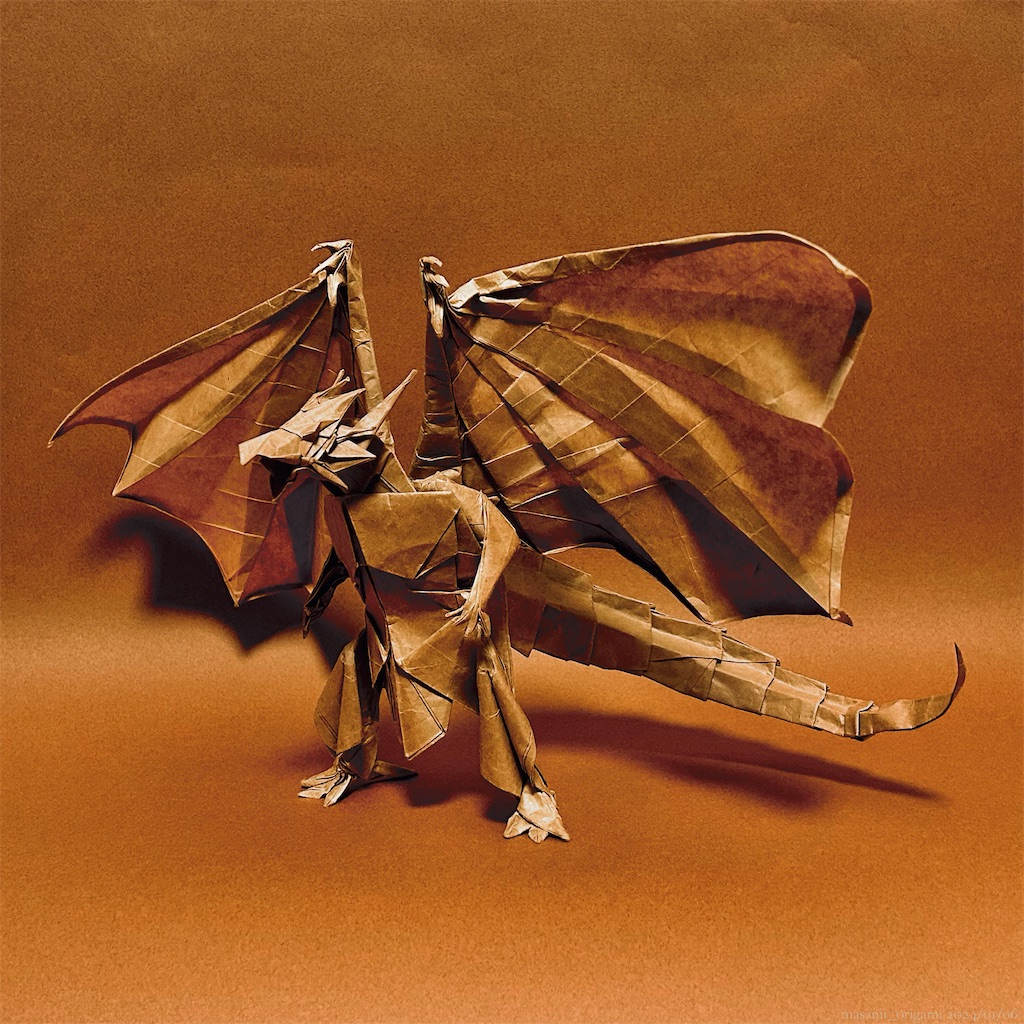
f:id:masanii_origami:20240106125250j:image
"Divine Dragon (Bahamut)" designed by Satoshi Kamiya.

6月に途中写真を公開したきり、続きを報告しないまま、とうとう新年を迎えてしまいました。
とはいえ、辰年にドラゴンをお披露目できるのは縁起が良いですね(言い訳)。
f:id:masanii_origami:20240106125256j:image
It's been new year while I left my unfinished work from June last year.
Unexpectedly it matches the zodiac, that’s Okay.

各パーツのアレンジや蛇腹のノリ入れなど、事後加工もしっかり行い、満足のいく出来栄えになったと思います。
仕上げが難しいと言われるバハムートですが、自分なりの答えが出せた気がして嬉しいです。
f:id:masanii_origami:20240106125350j:imagef:id:masanii_origami:20240106125355j:image
Through shaping or gluing of each part, I could finish it to a satisfactory shape.
Though this model is known for being difficult to shape after completion, I'm proud that I could find my own answer.

アトリエまさにぃ、新年一発目の投稿です。
前回の続きから、完成〜仕上げまでのプロセスをお楽しみください。
f:id:masanii_origami:20240106130221j:image
This is the first post in Atelier masanii.
Enjoy the processes from the continuation of last time to completion & shaping.

☘️☘️☘️

前回の記事です。
工程190でストップしています。
ここから手足や両翼、顔の細部を作っていきます。
f:id:masanii_origami:20240106130403j:image
(2023/06/20)

masanii-origami.hatenablog.com

On the previous post, it was suspended at step190.
From here, I'll make hands, legs, wings, and face, etc.

まずはシッポ。
段折りを繰り返すだけですが、節目の寸法がズレやすく、左右対象に作るのは結構難しいです。
側面を山折りして立体的にしたあとは、ポージングのため横方向へ曲げていきます。
段折りの各層をナチュラルにずらすには、手先の感覚が頼りです。
入念にノリ入れして、ダブルクリップで固定すれば、あとは乾くのを待つばかり。
f:id:masanii_origami:20240106130539j:image
【Tail】
All I have to do is make pleats structures, but it's pretty difficult to make it symmetry because the dimensions of each joint tends to be misaligned.
After making both sides three-dimensional by mountain-folding, bend the whole tail sideways to shape the posture.
To shift each layer moderately, it relies on sense of my hands.
After gluing firmly and fixing by clips, wait until it dries.

手と指は大改造の末、リアルな形に仕上げました。
指の根本の位置や伸びる方向、カールの具合などの調整に手こずりましたが、理想的な形になったと思います。
f:id:masanii_origami:20240106130717j:image
【Hands & fingers】
I deformed a lot and finished them real.
Though I struggled to adjust the root position and direction of each finger, or curl degree, it finished in the ideal shape.

造形は、同じ神谷哲史さんの「エンシェントドラゴン」の手指を参考にしています。
f:id:masanii_origami:20240106130758j:image
(2020/04/15)

masanii-origami.hatenablog.com

I referred to the structure of "Ancient Dragon" also designed by Satoshi Kamiya.

足です。
経験者の方なら分かってくれると思いますが…
この作品、足の改造が一番のネックじゃないですか??
テキスト通りの状態では、指になるカドがピッタリ水平に重なっていて、左右に開くには強引にずらす必要があります。この作業、なかなか上手にできないんですよねぇ…
私は今回、構造そのものをタテ方向に変換することで、それぞれの指がパカッと広がるようにしました。
さらに、そのままだと細すぎるので、両サイドを膨らませて潰しています。
この方法も無理矢理ですが、オリジナルよりも指ざっくり割ることができます。
後ろの指もしっかり作れるので、シッポが浮いた状態でも立つほどの安定感を出すことができました。
f:id:masanii_origami:20240106130935j:image
【Legs】
An experienced players would feel so, in this model, shaping legs is the most difficult, isn't it?
According to the textbook, layers for fingers are stacked up neatly, so I have to spread them by force and always struggle.
This time I made each finger spread by switching the structure to vertical.
And more, it's too thin as it is, so I pressed after inflating both sides. This way is also forcible but I could divide each finger far apart. And I could make back fingers bigger, so it stood stably even without tail.

翼は、全体・ツメ・生え方の3つに分けて解説します。
①全体:フチを曲線に折ることで丸みを出しました。強度を保つために二重に折っています。
②ツメ:ずらし中割り折りで指の方向を変えたあと、力技で細くカールさせました。
③生え方:主軸をタテに曲げて強度を出し、フロントビュー優先で姿勢を整えました。
f:id:masanii_origami:20240106131039j:image
【Wings】
①Overall:I rounded it up by folding the edges along a curve. And I folded lines double to keep durability.
②Claws:After switching the direction of fingers by inside reverse fold with different degrees, bended thinly by force.
③Shape:I make it durable by bending the axis in parallel, and adjusted the posture focusing on front view.

主役の頭です!
全体のバランスを見ながら、ツノの太さや方向を整えていきます。
「目」は折る角度や深さよって印象が大きく変わるので、下にできる影がシャープな三角形になるよう意識しました。
口元(特に下アゴ)のポイントは、適度な尖り方と立体感、自然な開き方を意識したこと、それからフチを少し折り込むことで強度を出したことです。テキストからかなり逸脱しましたが、結果オーライです。
あとは、首のヒダにしっかりノリを入れて、顔の方向を定めればオッケー。
f:id:masanii_origami:20240106131227j:image
【Head】
While browsing the overall balance, adjust the thickness & direction of horns.
The eyes appearance are change depending on its degree and width, so I considered so that the shadows are sharp triangle.
While making jaw (especially in lower one), I considered moderate sharpness, three-dimensional effect, natural degree of hinge. And made it durable by folding the edge slightly inside. Finally it was deviated from the textbook, it's Okay.
After that, I glued the layers inside the neck firmly and adjusted the direction of head.

各パーツも大事ですが、全身のバランスも大事です。
ノリ入れをする層が、まぁ多いこと多いこと。
ダブルクリップで固定したまま放置、次のパーツにノリ入れ…これを延々と繰り返していきます。途方もない作業です。
固定を誤るとヘンなポーズになるし、自立しないのは論外。
正直しんどいですが、このプロセスの有無が作品の完成度を左右するので妥協はできません!
f:id:masanii_origami:20240106131338j:image
It's important not only each part but also the overall body balance.
There're too many layers to glue! Leave it while keep being fixed by clip, then glue next part... repeat that process, it's endless work.
It'll be unstylish if I fix in a wrong way, and too bad if it can't stand alone.
Actually it was so hard but I couldn't compromise, because the completeness depends on these process.

で、完成したのがコチラ。
どーん!!!!
f:id:masanii_origami:20240106131550j:imagef:id:masanii_origami:20240106131552j:imagef:id:masanii_origami:20240106131628j:imagef:id:masanii_origami:20240106131714j:imagef:id:masanii_origami:20240106131803j:imagef:id:masanii_origami:20240106131915j:image
Finally it completed, like this!!

☘️☘️☘️

実はちょうど10年前に同じ作品を作ったことがあり、写真がFacebookに残っていたので比べてみました。
うん、少しは成長したみたいですね。
f:id:masanii_origami:20240106132252j:imagef:id:masanii_origami:20240106132334j:image
By the way, I have made this model just ten years ago. So I compared my current work to the past post on Facebook. I wonder my skill has improved.

昨年11月の市民文化祭にも、なんとか間に合いました。
f:id:masanii_origami:20240106132457j:image
(2023/12/13)

masanii-origami.hatenablog.com

I was also in time for the exhibition held in November.

スタート当初の写真が2023/06/12なので、実に完成まで5ヶ月、公開まで半年も経ってしまいましたが、何とか完成品をお披露目できてホッとしています。
お付き合いいただき、ありがとうございました!
f:id:masanii_origami:20240106132603j:image
The first photo was took in 2023/06/12, so it has been five months to complete, ana six months to show you! Although, I was relieved to release that works. Thank you so much for watching!

☘️☘️☘️

さて、あれよあれよという間に2023年が終わってしまいました。
今年はどれだけの作品を折れるでしょうか。折紙講師講習会やコンベンションも、ボサッとしていたらすぐにやって来るでしょう。
2023 has gone while I was lazy.
I wonder how many models can I make in this year. Exciting origami events will come soon!

これからも世の中の素晴らしい作品をたくさん紹介できるよう、頑張りたいと思います。
アトリエまさにぃ、今年もよろしくお願いします。
それではまた!
I'll do my best to introduce wonderful origami all over the world, stay tuned, see you again in Atelier masanii:)

高雅な折り紙 | 山口 真 |本 | 通販 | Amazon 


この記事をご覧になって「ためになった!」「今後も応援したい」と思った方は、ぜひページ下部から記事をご購入ください。
※任意のカンパという位置付けですので、内容の続きではありません
If there is a person who was impressed and can support my works, purchase the article from the form below.
※This means a voluntary donation, there is not a sequel.

この続きを読むには
購入して全文を読む

もうすぐ辰年!折り紙でつくる「龍のあたま」/Diagram of "Dragon head"

f:id:masanii_origami:20231229072640j:image
アトリエまさにぃへ、ようこそ。
そろそろ2024年ということで、辰年にちなんだ「龍」のマスコットを創作しました!
Welcome to Atelier masanii.
2024 is coming, I designed the mascot of dragon, commemorating the zodiac.

レベルとしては、
・そこそこ折り紙やってる人:初級
・普段あまりやってない人:中級
こんな感じでしょうか。
折り方を一挙公開しますので、ぜひ折ってみてください。
f:id:masanii_origami:20231229072833j:image
I may be easy for the experts, but little difficult for beginners.
I'll show you all the diagram, I'm happy if you try.

☘️☘️☘️
❶背景、創作にあたり/Background
❷諸注意/Notice
❸折り方公開/Diagram
☘️☘️☘️

❶背景、創作にあたり/Background

本件は、とある福祉事業所からのご依頼で、ここ数年続けて「干支マスコット」のオーダーを受けているものです。
I designed this model as a request from a welfare company, they thankfully orders me "Zodiac mascot" for every year.

前回(2023卯年)は、伝承のうさぎ。
(2023/01/01/)
2023年、伝承折り紙の「うさぎ」で幕開け!/Traditional origami "Rabbit" - まさにぃの折り紙コラム
In 2023 : Traditional Rabbit

前々回(2022寅年)はさくBさんの「とらねこ」を作りました。
(2022/01/03)
お正月にトラの折り紙を飾ろう!さくBさん作「とらねこ」/"TABBY CAT" designed by SakuB - まさにぃの折り紙コラム
In 2022 : "TABBY CAT" designed by SakuB

ほんとは今回も、既存作品からチョイスしたかったのですが…
Actually I wanted to choice among the existing model...

■要件1:量産できるシンプルなもの
不切正方形一枚折り、1つ10分以内にサクッと作れるのが理想。素材は量産するため15cm普通紙。
マスコットなので、かわいさ重視のデザイン。
■Requirement 1 : Simple & mass producible
It's ideal to be made of one square paper, and be completed in about 10 minutes.
The material is 15cm×15cm normal paper expecting mass production. And I designed it cute.

■要件2:メッセージを書くスペースがある
これは先方からのリクエスト。
つまり「面」を広く取れることが必須です。
■Requirement 2 : Space to write a message
This is a request from client.
That is, it's necessary to make the surface wide.

■要件3:版権的にNGでないもの
有償案件は、コレ特に重要。
創作者が分かるなら、承諾をもらう。もしくは売上を配分する。
(個人的には伝承作品なら良いんじゃない?と考えている)
■Requirement 3 : No copyright issue
This is the most important factor in paid case.
If the creator exists, we must get permission, or split the proceeds.
(I think it's no problem in case of the traditional model)

これらを満たす既存の「龍」がなかなか見つからなかったので、いっそ創作することにしました。
I couldn't find "Dragon" that meet those requirements, so I decided to make a new one.

全身を作ろうとしたけど、15cmでは複雑になり、何より短期間で創作する自信がなかったので「顔だけ」にしました。
その方が紙の四隅のカドを顔のパーツに使えるので、デザインの幅も広がります。
「おめめ」はペンで描くか、シールで対応してもらうことにしました。
f:id:masanii_origami:20231229073914j:image
I tried to design the whole body, but it'll be pretty complex, moreover I was unconfident to create it in a short period of time. So I made only head.
In that case, I can use four corners as each part of face, and various shape can be designed.
Eyes need to be drawn with a pen or put a sticker.

基本構造は、「凧(たこ)の基本形」の比率で正方基本形を作ったものがベースになっています。
大きい方の領域に顔の前側やツノを、狭い方に下アゴを割り当てました。
f:id:masanii_origami:20231229072908j:image
Base structure is "Square base" with a ratio of "Kite base".
I applied face & horn to the wider area, and jaw to the smaller area.

☘️☘️☘️

❷諸注意/Notice
たくさんの方に折ってほしいので、あまり制約は設けません。
おうちでも、学校でも、地域の教室でも、遠慮なくご活用ください。記事のプリントアウトや配布もOKです。
各写真にはネームを入れてあるので、常識的な範囲での画像の転載・引用もOKとします(トリミング不可)。
その際は、事前or事後のご連絡、またはメンションを飛ばしいただく等、私に分かるようにしてもらえると嬉しいです(必須ではありません)。
I want many people to play this model, so I won't set very strict rules.
At home, school, or local lesson, you can use without hesitation. You can also print & distribute.
I added my credit to every image, so you can reprint or quote them within common sense (no trimming).
In that case, contact or mention me before or after you use (if you can).

制作販売を含む有償案件で使用する場合は、事前にご一報ください。よほどのことがない限りNGは出しませんので。
その他、ご不明な点があれば、お気軽にお尋ねくださいませ。
If you use in paid case, including manufacturing and sales, contact me in advance. I'll allow unless it's insane.
If you have any question, feel free to ask me.

☘️☘️☘️

❸折り方公開/Diagram
お待たせしました。では、レッツチャレンジ!
Now, just do it!

f:id:masanii_origami:20231229073159j:image
f:id:masanii_origami:20231229073220j:image
f:id:masanii_origami:20231229073224j:image
f:id:masanii_origami:20231229073215j:image
f:id:masanii_origami:20231229073227j:image
f:id:masanii_origami:20231229073247j:image
f:id:masanii_origami:20231229073204j:image
f:id:masanii_origami:20231229073231j:image
f:id:masanii_origami:20231229073208j:image
f:id:masanii_origami:20231229073239j:image
f:id:masanii_origami:20231229073243j:image
f:id:masanii_origami:20231229073211j:image
f:id:masanii_origami:20231229073235j:image
f:id:masanii_origami:20231229073155j:image

☘️☘️☘️

はい、お疲れ様でした!
そろそろ展開図や折り図、ちゃんとソフトで描けるようにならなきゃいけないのかな…
Thank you for watching!
I wonder it's about time to draw CP or diagram with an official software...

さて、今年もたくさんの方にお世話になりました。
お会いした方、SNSで交流した方、そしてブログ読者のあなた。いつも気まぐれ投稿にお付き合いいただき、ありがとうございます。
f:id:masanii_origami:20231229072921j:image
I express my gratitude to everyone who I met this year, interact on social media, and watch my blog.

来年も、アトリエまさにぃをよろしくお願いします。
See you next year, in Atelier masanii:)


この記事をご覧になって「ためになった!」「今後も応援したい」と思った方は、ぜひページ下部から記事をご購入ください。
※任意のカンパという位置付けですので、内容の続きではありません
If there is a person who was impressed and can support my works, purchase the article from the form below.
※This means a voluntary donation, there is not a sequel.

この続きを読むには
購入して全文を読む

【展示レポ】公民館の市民文化祭/Origami exhibition at local public hall

f:id:masanii_origami:20231212223335j:image

アトリエまさにぃへ、ようこそ。
今日は展示レポです。
Welcome to Atelier masanii.
Today I'll report about an exhibition.

地元の公民館で開催された「市民文化祭」の様子をお届けいたします。
今年も、私たちのサークルで作品を出させていただきました。
ちなみに、昨年の様子はこちら。
(2022/11/07)

masanii-origami.hatenablog.com

It's held in the public hall every year and our class members joined again.
(I'll show you the last year's post above)

学校や幼稚園などの施設はともかく、折り紙の展示を一般向けにやってる団体は、市内でウチだけかもしれません。
(そもそもコミュニティがウチだけかも…)
日頃の活動を地元にお披露目する数少ない機会、たくさんの方が足を止めてくださり嬉しかったです。
Except the educational institution like schools or kindergartens, we may be the only club in the city that exhibits origami works publicly.
(Or there's no origami club except us isn't it?)
It was a precious opportunity to show our activity in public, and I was happy that many people stopped their feet.

さて、芸術の秋どころか師走になってしまいましたが、せっかくなので順番に紹介していきましょう!
Though it has already been more than a month, now I'll introduce one by one.

☘️☘️☘️

まずはTさんの「胡蝶蘭」。
月刊おりがみ569号の作品です。
凛として、美しいですね〜。
f:id:masanii_origami:20231212223346j:image
T-san made "Phalaenopsis orchid", listed in Monthly ORIGAMI magazine No.569, beautiful!

これ、2月の公民館まつりでも見かけたかも…と思って見比べてみたら。
花びらが17個→27個に増えており、しかも位置によってサイズが違っています。まったくの別モノでした!芸の細かさに脱帽です。
f:id:masanii_origami:20231212223353j:image
I remember he made a same model in February, so I compared them.
I realized that the petals have been increased from 17 to 27. And more they vary in size depending on their location.
I was impressed by his precise work.

Keikoさんの「おりがみのクリスマスリース」。
佐藤ローズに小花を散りばめた、芸術的な逸品です。
黒いフレームと金色の背景、それに美しい佐藤ローズ。私には真似できない、非常に洗練された作品をお寄せいただきました。
足を止め、かがんで覗き込む来場者が多くいらっしゃいました。
f:id:masanii_origami:20231212223407j:imagef:id:masanii_origami:20231212223411j:image
Keiko made "Origami christmas wreath", an artistic masterpiece that puts Sato roses with sprinkled small flowers.
Beautiful roses stand on the golden background surrounded by black frame.
It's a sophisticated work tham I can't do!
I saw most visitors stopped their feet and watched carefully.

お次もバラです!
Oさんの「バラが咲いた」は、色とりどりの佐藤ローズ「四角のつぼみ」を詰め込んだ大作です。
普段からとても熱心に練習されている姿が印象的なOさん。
自宅でたくさん作ったバラの中から厳選して出品してくださいました。
f:id:masanii_origami:20231212223422j:imagef:id:masanii_origami:20231212223426j:image
Next work is also Roses.
O-san made "Roses bloom", that various colored Sato roses (Square rose bud) are stuffed in a box.
I know she has practiced so hard from usual.
She selected the best ones among her works that she made at home.

はぁちゃんママの「怪しいパーティ」。
カミキィさんの作品のハロウィンキャラが、ポップにかわいく飾られています。
オリジナルの水彩絵手紙も素敵です!
f:id:masanii_origami:20231212223433j:image
Ha-chan's mon made "Suspicious Halloween party".
Halloween mascots designed by Kamikey are displayed naughtily & cutely.
A watercolor postcard next to them is also nice!

はぁちゃんの「COLORFUL」。
ぱりっとした透明な袋の中には…
f:id:masanii_origami:20231212223441j:image
Ha-chan exhibited "COLORFUL".
In a transparent package...

カメレオンが3匹並んでいました。かわいい。
素材はカミキィさんの「抗菌おりがみ」でしょうか。
f:id:masanii_origami:20231212223447j:image
Three chameleons were standing in a row. Cute!
The material is probably "Antibacterial origami" produced by Kamikey.

Nさんのは折り紙でなく「布絵」を飾ってくれました。やわらかく素朴で、暖かい雰囲気が素敵な作品。タイトルは「かくれんぼ」です。
こんな特技があるなんて知りませんでした!
f:id:masanii_origami:20231212223452j:image
N-san exhibited cloth painting, that has warm, soft & familiar mood. The title is "Hide & seek".
I didn't know she has such a skill!

さて、私の作品は…
これは、別の記事にて紹介しようかと思います。
そう、今まで放置していたアレがついに完成しました。
記録がまとまるまで、今はシークレットにしておきましょう。お楽しみに!
f:id:masanii_origami:20231212223457j:image
By the way, I'm going to show my work on another post.
You know, it finally completed that I left it unfinished.
I'll keep it a secret until I write an article. Stay tuned!

☘️☘️☘️

やや駆け足でしたが、市民文化祭の様子をお届けいたしました。
このイベントはほかにも工芸や写真、活け花など色々な力作が揃っており、見ごたえたっぷりの1日でした。
f:id:masanii_origami:20231212223506j:image
I've introduced the exhibition in the public hall, though it was in a hurry.
There're crafts, photos, Ikebana and many other eye-catching artworks.

サークルの身内で楽しむのはもちろん、こうして多くの方の目に触れる機会があるのは嬉しいですね。普段は作りっぱなしで、お蔵入りしてしまう作品がほとんどですし。
こうした目標があると、活動にもハリが出ます。
I'm happy that we can have an opportunity to show our activity, not only in my origami class. I usually leave the completed models out.
We're motivated if having such a goal.

さて、今年も暮れに向けてカウントダウンが始まりそうです。あとどれだけ作品を折れるでしょうか?
やりたい事はたくさんあるので、時間を見つけて頑張ろうと思います。
すっかりコートが手放せない季節になってきました。皆さんもご自愛くださいませ。
Now it's almost the end of the year, I wonder how many models I can try. I'll do my best.

では、今日はこのへんで。
アトリエまさにぃで、またお会いしましょう。
That's all for today!
See you again in Atelier masanii:)

【参考図書/Reference】
月刊おりがみ 569号/Monthly ORIGAMI magazine No.569
https://amzn.to/3TRAvn7

本物みたいなバラの折り紙/Sato rose
https://amzn.to/48GMwju
カミキィの季節のおりがみ/Kamikey
https://amzn.to/3tyUdcM


この記事をご覧になって「ためになった!」「今後も応援したい」と思った方は、ぜひページ下部から記事をご購入ください。
※任意のカンパという位置付けですので、内容の続きではありません
If there is a person who was impressed and can support my works, purchase the article from the form below.
※This means a voluntary donation, there is not a sequel.

この続きを読むには
購入して全文を読む

e-Taxのイータ君(非公式)創作記。/Diagram of "e-Ta-kun"

f:id:masanii_origami:20231123235128j:image

イータ君って、折れるのか?
Can you create "e-Ta-kun"?

いつかの休日、とある人からこう言われました。
One day a certain person told me so.

何すかイータ君って。
え、e-Tax
確定申告にキャラクターなんかいたんすか?
どれどれ…
I didn't know there's an official mascot of online tax declaration, so I searched.

国税電子申告・納税システム(e-Tax)のイメージ定着のため、シンプルで親しみやすいオリジナルキャラクターとして平成16年10月1日に誕生しました。」国税庁HP抜粋
https://www.e-tax.nta.go.jp/chuijiko/e-ta.htm
"He was born on Oct 1st 2004, as a simple & friendly mascot, to spread online tax declaration and tax payment system."
※Reference: Website of National Tax Agency

こんなキャラいたんですね。
確かに、折り紙作品としても成立しそうなデザインです。
I didn't know that, but certainly it'll stand enough as an origami.

普段あまり創作はやりませんが、彼の頼みであれば、ひと肌脱がせてもらいましょう!
アトリエまさにぃ、今日もよろしくお願いします。
Although I rarely create an original works, let's do it if that's his request.
Atelier masanii has started!

※本記事および作品は個人の趣味で作ったコンテンツであり、国税庁e-Tax等の公式とは無関係です
※These contents are just only for my private activity, so they're not related to the official.

☘️☘️☘️

イータ君(非公式)をデザインするにあたって、私なりに色々考えました。
Coming up with a design of e-Ta-kun, I considered a lot.

まず、顔と体は別々に作ることにしました。
完成サイズもそこまで小さくならないし、シンプルな構造の方が「かわいさ」が出るからです。
全身を一枚で作ると相当小さくなり、蛇腹を駆使した複雑系ならではの「えげつなさ」が出るでしょう。
折り紙は、こういうところのバランス感覚が大切です。
At first, I decided to make the head & body separately. In that way the completed size will not be so small, and it'll be cuter with simple structure.
On the other hand if I make them all with one square paper, it'll be pretty small and too detailed, unique to the complex models that with applying bellows structure.
The balance is really important in such a thing.

では、これより「頭」「体」それぞれの折り方を公開しちゃいます。
文字や記号を入れると面倒…いや、公開が遅くなるので、いっそプレーンに途中写真だけ並べることにしました。
同じものを折りたいという奇特な方は、推測しながら頑張ってみてください。
(質問は受け付けます)
Now, I'll show you how to make the head & body.
I decided to show only pictures, because inserting the comments & symbols, it'll be bothersome... no, the publication will be delayed.
If you'd like to make, just do it by guessing the processes! (Any questions available)

☘️☘️☘️

【頭について/Head】

顔をデザインする時は、白いキャンバスに絵を描くような感覚です。
こんな時は「インサイドアウト(紙の裏表を色分けする技法)」の出番!
簡単にいうと、紙のカドやフチを持ってきて、めくればいいのです。
この技法を自由自在に用いた例として、文字や模様、国旗など、数々のユニークな作品が生み出されています(道路標識を折る人までいます)。
When I design the face, it's like drawing a picture on canvas.
In such a case, "Inside-out" will be suitable!
(a technique that separate colors using both sides of the paper)
Simply put, turn over bringing the tips of the corners or edges.
Using that technique, various unique models are created in the past. Letters, patterns, and national flags, even road signs!

イータ君(非公式)の顔のパーツは「目+目+口」の3要素とします。
(輪郭までデザインすると大変なのでやめました)
これくらいのレベル感に最適なのは、いわゆる「メダル」の前身となるコチラの基本形です。
f:id:masanii_origami:20231123235801j:image
I considered his face is configured of three factors, two eyes + mouth.
(I didn't design the colored outline because it'll be pretty complex,)
For such a difficulty, base structure that is the predecessor of traditional "Medal" is suitable.

これは「二そう舟基本形」の四隅をつぶしたもの。「だまし舟」の形に近いですね。
構造を見ると、すべてのカドフチが中心に集まっています。つまり「めくって色を出すポイント」がたくさん。
これを少しずつ改造すれば、ある程度の模様は折り出せるわけです。
余談ですが、Abrahamさんの「トンボ」も同じ構造からできています。
(2019/06/21)

masanii-origami.hatenablog.com

This is a structure made by processing every corner of "W-Boat Base", close to "Sailboat (trick catboat)".
Browsing the structure, every corner & edge gathers to the center. That is, there're many areas that can be colored by being turned over.
By deforming this shape, various patterns can be generated.
Asides, "Dragonfly" designed by Abraham has the same base.

では、写真いきます!!
Now, I'll show you all!
f:id:masanii_origami:20231124000209j:image
f:id:masanii_origami:20231124000212j:image
f:id:masanii_origami:20231124000202j:image
f:id:masanii_origami:20231124000206j:image

☘️☘️☘️

【体について/Body】

頭のベースを変形させた「風車」の構造なら、4つのカドから手足を作れると踏んだのですが…
f:id:masanii_origami:20231124000400j:image
I thought hands & legs can be made by deforming the head, that is close to the structure of "Pinwheel".

なんか、スリムになり過ぎちゃいました。
いや、これはこれで良さげなんだけど、似てないのですw
f:id:masanii_origami:20231124000407j:image
However it became too skinny.
Not bad, but doesn't resemble. lol

作戦変更です。
紙のフチを蛇腹にして、四隅を細長く伸ばしていく方法を思い付きました。
宇宙ヨット「イカロス」の動力源である太陽光パネルと同じ構造なので、ご存知の方もいらっしゃるかもしれません。
f:id:masanii_origami:20231124000428j:image
【参考サイト/Reference】

www.athome-academy.jp

Plan B.
I came up with the strategy to stretch four corners by making every edge bellows.
It is the same structure to a solar panel applied to space yacht "IKAROS", you may have already known.

勝田恭平さんの「グリフォン」の手足が同じ構造だったのを思い出したのです。色々な作品を折ってきた経験が、こういう時に役立つのは嬉しいですね。
(2020/07/04)

masanii-origami.hatenablog.com

I remembered that it's same to legs of "Griffon", that was designed by Kyohei Katsuta.
I'm pleasure that my experiences were useful in such a scene.

脚の長さを確保するために、蛇腹を一段だけ反転させています。
f:id:masanii_origami:20231124001049j:image
I inverted one layer to keep the legs long.

あとは「箱をつぶす要領」で体を小さくします。
f:id:masanii_origami:20231124001101j:image
Then I made the body small like squashing the box.

胴体を縮めるため、肩をナナメに折り込みます。
f:id:masanii_origami:20231124001108j:image
Folded the shoulders diagonally to shorten the body.

両手の作り込みは、こんな感じ。
f:id:masanii_origami:20231124001116j:imagef:id:masanii_origami:20231124001121j:image
Hands are made like this.

脚の根本は中割り折りで丸めます。
両足は谷折り+先端を中割り折り。
f:id:masanii_origami:20231124001127j:image
Made the base of legs round, by "Inside reverse fold".
The foots are made of valley fold, and the tips are "Inside reverse fold".

これで体はオッケー。
f:id:masanii_origami:20231124001132j:image
The body completed.

☘️☘️☘️

顔と体が揃いました。
ドッキングする前に、ノリ入れをしっかりやりましょう。
顔に挟み込むような形で体を差し込めば、イータ君(非公式)の完成です!!
f:id:masanii_origami:20231124001200j:image
There're Head & Body.
Before combining both, it must be glued firmly.
Inserting the body to the head like sandwiching, done!

ちなみに顔だけでもかわいいです。
うしろを接着しないまま「イータ君スタンド」にしてお届けしました。
f:id:masanii_origami:20231124001246j:image
The face alone is also cute.
I made "e-Ta-kun stand", keeping the back side unglued.

せっかくなので、たくさん作りました。
高額納税者を称える「ゴールデンイータ君」
f:id:masanii_origami:20231124001253j:image
Making this opportunity, I made a lot.
"Golden e-Ta-kun", who praises high-income taxpayer.

脱税者を成敗する「ブラックイータ君」
f:id:masanii_origami:20231124001257j:image
"Black e-Ta-kun", who purges tax evader.

公式の設定は「空も飛べます」と書いてあったので、先方にはセルフで飛んでいってもらいました。嘘です。レターパックで送りました。
f:id:masanii_origami:20231124001302j:image
The official setting says "He can fly", so I made them fly to the client by themselves. Is a lie, I shipped.

☘️☘️☘️

はい、イータ君(非公式)、久しぶりの創作折り紙でした!
いつもはテキストの作品を折るだけなので、創作の難しさを身をもって感じました。
このレベルで大変なんだから、もう頭が上がりません。作家の方々は一体どんな頭をしているのでしょうか…
今後はより尊敬の念を持って、作品に向き合っていこうと思います。
f:id:masanii_origami:20231124001317j:image
"e-Ta-kun", my original work after a long time!
I always play models in existing textbooks, so I realized the difficulty to create a new work.
I felt hard even this level, I wonder what spec of brains the creators have...
From now on I'll face each existing model with more respect.

さて、職場の年末調整もひと段落。
そろそろ年末ですね。ふるさと納税はしましたか?
すっかり寒くなりましたが、温かいものを食べて、冬を元気に乗り切りましょう。
By the way, the year-end tax adjustment has been finished.
Year end is coming, have you applied hometown tax?
It's getting cold, have something warm and take care of yourself.

それでは、今日はこの辺で!
アトリエまさにぃで、またお会いしましょう。
That's all for today!
See you again in Atelier masanii:)

「キレイ」の裏に試練あり!まさにぃの失敗作特集/masanii's failure works

私たちが暮らしているのは、はるか昔から積み重なった大地の、ほんの表面でしかありません。
太古の地層の割れ目をのぞくと、地球が営んだ様々な活動、その痕跡を今も見ることができます。
長期間にわたり高温高圧にさらされた無機物の一部は、エメラルドなどのベリル鉱物、サファイアなどのコランダム鉱物、そしてダイヤモンドに代表される美しい結晶となりました。
また、有機物の一部は堆積して化石燃料となり、現代文明の礎を築きました。
The place where we live is just only the surface of the ground, accumulated from ancient times.
When we look into the strata, there're traces of numerous activities that the Earth has accumulated, even now.
Some inorganics exposed to high temperature & high pressure, became Beryls like an emerald, Corundums like a sapphire, or beautiful crystals represented by Diamond.
And some organics deposited and became fossil fuel, they built a foundation of modern civilization.

さて、美しい作品が生み出される背景には、数々の失敗や試行錯誤があります。
こうした積み重ねが、今の私の「燃料」になっているのです。
By the way, there are a lot of failures or try & errors behind generating beautiful works.
And now they live as "Fuel" of mine.

これが言いたかっただけです。
アトリエまさにぃへ、ようこそ。
I wrote just to say that.
Welcome to Atelier masanii.

☘️☘️☘️

地球史(特に生物史全般)の話は興味が尽きませんが、そろそろ折り紙の話をしましょう。
今日は「失敗&試作品特集」です!
f:id:masanii_origami:20231105235031j:image
I'm endlessly interested in the Earth history (especially in biological history), but it's time to talk about Origami.
Today's topic is "Failure & Prototypes"!

胸を張ってお披露目できる投稿の裏側には、「やぶれた」「ズレた」「もう折れない」がてんこ盛り。
修復不要・見るも無惨な姿から、リカバリー(ごまかし)で押し切った事例などを集めてみました。
Behind my proud works, there're countless terrible happenings "torn" "misaligned" "can't anymore".
I'll show you from the cruel appearance that I couldn't repair to examples that could be recovered.

まずはドーン!!!
宇宙人の死体…ではありません!
長山海澄さんの「カメレオン」、その初見チャレンジです。
f:id:masanii_origami:20231106001413j:image
First, this is an alien corpse... no, it's "Chameleon" designed by Kaito Nagayama, my first attempt.

バネのように飛び出た目玉、首から出る謎の突起、それに安っぽいコピー用紙が最高にDope!
このエイリアンくんのお陰で、厚みの処理が相当大変と分かり、仕込みの正確さや折りの強さの重要性、仕上げのノリ入れの必要性を頭に叩き込んだのでした。
f:id:masanii_origami:20231106001424j:image
Eyes popped out like a spring, strange protrusions from the neck, and cheap plane paper, it's ridiculously dope!
Thanks to THE BOY I realized the difficulty of processing the thickness, so I remembered the importance of accurate preparation and the press strength, and necessity of gluing to shape finally.

本折りがこちら。
「プレス・ノリ入れ・またプレス」という感じで、厚みを限界まで解消しました。
f:id:masanii_origami:20231106001438j:image
I tried again.
I eliminated the thickness to the limit, by press →glue→press again.

(2018/12/30)
masanii-origami.hatenablog.com

☘️☘️☘️

次いきましょう。
神谷哲史さんのアマガエル…になれなかったモノ。
車に轢かれたみたいに無惨な姿になってしまいました。ひどいですね〜!
f:id:masanii_origami:20231106001454j:image
Next.
This is "Tree Frog" designed by Satoshi Kamiya... it didn't become so.
It's pity state that looks like being hit by car. Awful!!

(2018/03/18)

masanii-origami.hatenablog.com

で、本折り。
24cm普通紙、仕上げはスプレーニスを吹きました。
我ながら良くできた、お気に入りの作品です。
今でも出張講座のたびに持参し、会場に飾っています。
f:id:masanii_origami:20231106001505j:image
I tried again.
Using 24cm normal paper, finally I applied varnish.
I'm satisfied with quality and it's one of my best works.
I still bring and display it in my origami seminar.

(2018/03/17)

masanii-origami.hatenablog.com

www.origamihouse.jp

☘️☘️☘️

まだまだありますよ〜!
キム・ドンヒョンさんの「Temple Dragon」。
複雑系の中でもトップクラスに難しかったです。思い出すだけでも恐ろしい。
素材は53cmホイル。終盤に差し掛かった頃に悲劇は訪れました。
脳天を裂く、必殺の一撃!!
f:id:masanii_origami:20231106001519j:image
There's more.
"Temple Dragon" designed by Kim Dong-Hyeon.
It was overwhelmingly difficult among complex origami models. It's scary just remembering it!
Using 53cm foil paper, the tragedy happened in a final part.
A blow that pierces the head!!

ほぼ致命傷だったのですが、真っ二つに割れなかったことが幸いし、スティックのりをセメントのように流し込んで奇跡の生還。意地です。
f:id:masanii_origami:20231106001530j:image
It looked like a fatal damage, but fortunately it didn't tear into two, so achieved a miraculous survival by pouring glue like a cement.

(2020/04/05)

masanii-origami.hatenablog.com

origami.jp

☘️☘️☘️

神谷哲史さんのカマキリ。
この作品もエグいですよね〜。
試作品では背中がパックリ割れ、テープで留める羽目に!
何とか最後まで行ったけど、ひどい有り様です。
f:id:masanii_origami:20231106001543j:image
"Praying mantis" designed by Satoshi Kamiya.
In my prototype, the back torn, so I end up having to tape it down.
Although I somehow reached the end, it was terrible.

銀ホイルの残骸を犠牲にして、完成したのがコチラ。
目元の作りが甘いけれど、当時としては良くできました。
f:id:masanii_origami:20231106001555j:image
At the expense of silver foil debris, I completed.
Shaping around eyes was not enough but it was quite good at that time.

(2020/05/31)

masanii-origami.hatenablog.com

3年後、90cmクラフト紙で再挑戦。
これは満足のいくクオリティに仕上がりました!
f:id:masanii_origami:20231106001606j:image
Three years later, I tried again with 90cm craft paper.
It completed satisfactory shape!

(2023/03/24)

masanii-origami.hatenablog.com

www.origamihouse.jp

☘️☘️☘️

ふっくらかわいい、勝田恭平さんのポメラニアン
しっかり折り込んであげないと、このようになります。コワすぎる。
f:id:masanii_origami:20231106001618j:image
Plump & cute "Pomeranian" designed by Kyohei Katsuta.
If we don't fold firmly, it become like this. Scary!!!

(2019/03/15)

masanii-origami.hatenablog.com

☘️☘️☘️

最後に、佐藤ローズの失敗作を集めてみました。
Finally, I'll introduce the failure works of Sato rose.

まずは中心の貫通。佐藤ローズあるあるです。
ペンでグリグリする時、外側に向かって広げるのがコツなんですけど、下方向に力をかけるとこうなります。
ちなみに、裏からつついて周辺の紙を寄せると、これくらいの穴は結構隠せます。
f:id:masanii_origami:20231106001634j:image
f:id:masanii_origami:20231106001637j:image
First, penetration of the center. This is a common mistake in Sato rose.
When opening the central petals with pen, we should expand towards the outside. But if pressing downwards, it happens.
By the way, a hole like this can be hidden relatively easily by pecking from behind and bringing the surrounding paper towards the center.

(2019/11/07)

masanii-origami.hatenablog.com

(2019/09/12)

masanii-origami.hatenablog.com

続いて、花びらが裂ける悲劇。
特にガーデンローズやロゼット咲きのオールドローズなど、カップ状のバラは要注意です。
上部のフチがすぼんだ壺のような形を作るには、内側に指を突っ込んで中段を膨らませる必要があるのですが、この瞬間にフチをビリッとやっちゃうんですよね。
私はこの類のバラが苦手なようで、どんなに注意しても一定の確率で裂けます。まだまだですね。
f:id:masanii_origami:20231106001702j:image
f:id:masanii_origami:20231106001659j:image
Next, tragedy that the petals tear.
Especially in cup-shaped rose like Garden rose or Rosette, be careful.
To make the jar shape that the upper rim is narrow, it's necessary to inflate the middle by inserting finger inside. But at that time, the edge tends to be torn.
I'm not good at making this kind of rose, often tear it with a certain probability. I must improve more!

(2019/11/21)

masanii-origami.hatenablog.com

(2019/11/15)

masanii-origami.hatenablog.com

最後に、底の崩壊。
後で開かないようにギチギチに締めていたら、「ブチッ」と鈍い音がしました。
ノリを流し込んで固定し、何とか元の形に漕ぎつけたのですが、ヒヤヒヤものです。力任せはいけませんね。
f:id:masanii_origami:20231106001718j:image
Finally, bottom collapse.
When tightening the bottom strongly not to be opened later, I heard a dully sound.
I thought I failed, but I fixed somehow recovered by pouring glue.
Shouldn't use too much force.

(2020/01/10)
masanii-origami.hatenablog.com

佐藤ローズをたくさん投稿している私ですが、こんな感じで結構失敗してます。
リカバリーできず、サヨナラしたものも数知れず。
ヴィヴァルディなどの貴重な素材でやっちゃうと、凹むんですよねぇ…
しかし、こうした痛みを教訓に、「してはいけない事」「力加減」「素材の性質と限界」を学んでいくと、何となく成功するより学びが多いです。
f:id:masanii_origami:20231106001736j:image
Although I have made quite a lot of rose, I often fail as I mentioned above.
There're countless failure works that I couldn't recover and disappointedly throw away.
It's so sad especially in precious materials like Vivaldi.
However, through such painful experiences, and remembering "Prohibited things" "Adjustment of force" "The Material properties and durability limits", it's more learningful than unconscious successes.
☘️☘️☘️

はい、お楽しみ(?)いただけましたでしょうか!
久しぶりに、キレイどころの裏側をお送りいたしました。
水の泡になった苦労も、ネタになれば報われます。
失敗作や試作品、完成途中のプロセスは意外なほどウケが良く、本番よりイイねが付くこともあるんですよね。
(完成品を見てくれぇ!)
Did you enjoy my terrible works behind the clean ones?
If they become joke topics, my effort will be rewarded.
Failure works or prototypes, or production processes are unexpectedly fun for my followers, sometimes I get more Likes than the clean ones. (See my completed works more!)

SNSの世界は美しく完成されたアートで満ち溢れていますが、多くのアーティストは「その域」に達するまでに相応の時間や精神力(+時にお金)を費やしています。
その過程はあまり表に出てきませんが、そのプロセスは完成品と同じくらい価値があると思うんです。
In social media, there are full of beautiful completed masterpieces, but most artists cost an appropriate times or mental energies (and sometimes appropriate money).
The processes are rarely showed, but it's as worthfull as the photos of a completed model.

情報交換を通じて高め合えるのも、SNSのいいところ。
あなたの手元も「その瞬間、見たい!」と思っている人がいるかもしれませんよ。
Social media is really useful that enable us to interact and exchange information.
Your moments under the hardship may will be precious for someone.

それでは、今日はこのへんで。
アトリエまさにぃで、またお会いしましょう。
That's all for today!
See you again in Atelier masanii:)

【参考図書/Reference】

新世代 至高のおりがみ/New generations of ORIGAMI

https://amzn.to/47srbZW

本物みたいなバラの折り紙/Sato rose

https://amzn.to/3vrrVRX


この記事をご覧になって「ためになった!」「今後も応援したい」と思った方は、ぜひページ下部から記事をご購入ください。
※任意のカンパという位置付けですので、内容の続きではありません
If there is a person who was impressed and can support my works, purchase the article from the form below.
※This means a voluntary donation, there is not a sequel.

この続きを読むには
購入して全文を読む

結婚式の前撮りに「手まり」のプレゼント「なでしこ」「こでまり」婚礼バージョン/Special flower ball "Nadeshiko(Dianthus)" "Kodemari(Spirea)" for wedding

アトリエまさにぃへ、ようこそ。
Welcome to Atelier masanii.
f:id:masanii_origami:20231006113442j:image
前回の記事では、結婚する親友に贈ったプレゼント、二人の趣味にちなんだ作品「フグ」と「青い鳥」をご紹介しました。
(2023/09/28)

masanii-origami.hatenablog.com

On my previous post, I introduced some gift for my friend who's got married, "Pufferfish" and "Blue bird" related to their hobby.

で、今日は予告どおり、メインギフトをご紹介します。カラフルな2つの「手まり」です。
f:id:masanii_origami:20231006113454j:image
As I announced, today I'll introduce the main gift, colorful two Flower balls.

「前撮りの小道具として、手まりを作ってほしい」
という彼からの要望にお応えすべく、渾身のユニット作品を贈呈することに決めました。
In response to his request "I want some props for our pre-wedding photoshoot", I decided to gift the origami unit works, from my heart.

選んだ作品は、
・カラフルな方が「なでしこ(改)」
・赤白ベースの方が「こでまり」
f:id:masanii_origami:20231006113507j:image
The models I chose are "Nadeshiko(Dianthus)" the colorful one, and "Kodemari(Spirea)", the red & white one.

布施知子さんの著書はじめてでも組める くす玉おりがみに掲載されている38種類・152通りの中から厳選しました。
テキストの見本とはずいぶん違うカラーリングですが、これは私のこだわりです。
I carefully selected the above models in 38 models and 152 variations, listed in the textbook designed by Tomoko Fuse.
These photos are quite different from the examples in textbook, this is my commitment.

それでは、レポートいきましょう!
Now let's report!

☘️☘️☘️

やわらかく、かわいい
これが新郎からのリクエストでした。
Soft & cute
This was a request from groom.

このテキストの作品を選んだのは、パーツが「ベース」「フェース」の2枚組で、より多くの色を使えそうと踏んだからです。
同書のラインナップは星型多面体ですが「くぼみ」を埋めるような飾りが付いたモデルなら、より球形に近づくと予測しました。
組み方はもちろん、いちばん豪華な30枚組です。
f:id:masanii_origami:20231006113538j:image
The reason why I chose these models in the textbook was that, they contains two parts "Base & Face" in each unit, so I thought I can use more various colors.
Every model is all Stellation, but I predicted that the specific model with the structure that fill the dimple can be made it closer to a spherical shape.
Of course I chose 30 units, the most gorgeous type.

素材は、金ホイル×和紙のハイブリッド。
「なでしこ」はベースを和紙、フェースをホイル。
「こでまり」はベースをホイル、ベースを和紙で配置を決めました。
全体のバランスを考えての選択です。
f:id:masanii_origami:20231006113554j:image
The material is a hybrid, gold foil paper & Washi.
"Nadeshiko" is foil base & washi face.
"Kodemari" is washi base & foil face.
I decided that combinations, considering the overall balance.

異なる素材の組み合わせは、厚みの調整や接着が難しい場合もありますが、そこは気合いでカバーしました。
f:id:masanii_origami:20231006113603j:image
Combination of different materials sometimes become difficult to adjust thickness or gluing, but I've done.

まずは「なでしこ」。
撫子はダイアンサスとも呼ばれる、カーネーションと近縁の花です。
色を変えると、雰囲気もガラリと変わりますね。
f:id:masanii_origami:20231006113612j:image
First, "Nadeshiko".
This is a flower closely related to carnations, also called Dianthus.
If the colors change, the mood changes dramatically.

しかし完成後…
とある問題に気づきました。
f:id:masanii_origami:20231006113620j:image
But after completed, I realized a certain problem.

やわらかくない。
景気は良さそうなのだが、丸っこくないじゃん!
別の作品を一から作り直そうかと本気で考えましたが、あるアイディアが浮かびました。
f:id:masanii_origami:20231006113628j:image
NOT soft!
Gorgeous but NOT spherical.
I considered about making another model, but I caught up with a solution.

改造したらいいじゃん。
Just remodel!

蝶のように開いた金色のヒダを分解して伸ばし、クルンと丸めてからポケットに再び格納してみました。
すると、クラッカーのような円錐形に変化したのです。
f:id:masanii_origami:20231006113641j:image
I disassembled and stretched the gold layer opened like a butterfly, and after curling it, interested the tip into the pocket.
Then it transformed into cone like a cracker!

すべてのパーツでやってみたら、なかなか良い感じにソフトになってくれました。
よし、合格。これ採用!!!
f:id:masanii_origami:20231006113648j:image
When I repeated that on every part, it became moderately soft. Excellent!

☘️☘️☘️

続いて「こでまり」。
モデルになった小手毬という花は、小花がまとまって球形になった優雅な花で、スズカケとも呼ばれます。
赤白金の3色で作ると、どことなくクリスマスカラーになりますね。新婦の和装に似合うと良いのですが。
f:id:masanii_origami:20231006113656j:image
Next, "Kodemari".
Kodemari flower from which the model takes its name, is elegant flower that florets clustered together in a spherical shape, and also called "Spirea".
Making with three colors of red, white and gold, it looks like Christmas. I hope it'll be suitable for bride's kimono.

完成品。
思ったよりゴールド多めで、花柄が思ったより隠れてしまいましたが、コレはコレで綺麗です。
f:id:masanii_origami:20231006113706j:image
Completed.
Unexpectedly it has a lot gold area and the floral pattern was hidden, but not bad.

「なでしこ」と並べてみました。
まんまる、とはなりませんでしたが、婚礼らしく豪華に仕上がったので良しとしましょう。
オッケー、これで任務完了です!
f:id:masanii_origami:20231006113712j:image
I placed both side by side.
They couldn't be perfect sphere, but became gorgeous like a wedding. So that's OK, my mission has accomplished!

☘️☘️☘️

布施知子ユニット「なでしこ」「こでまり」結婚祝いバージョン。
前回紹介した「フグ」「青い鳥」を添えて、無事にお届けできたので一安心です。
Origami units "Nadeshiko(Dianthus)" "Kodemari(Spirea)" designed by Tomoko Fuse, special works for wedding.
I'm relieved that I could ship them safely, with "Pufferfish" and "Blue bird", that I introduced on the previous post.

好きな作品を気ままに折るのも好きですが、こうして贈る相手のことを考えながら作るのも、また格別です。新鮮な発見もたくさんあります。
うちに大量にある素材のストックが、こうした形で役立つのも嬉しいです。
I like to make my favorite model freely, on the other hand, making while thinking about the person whom I present to, it especially pleasant time.
I'm happy that I could utilize a lot of material stock at my room, for such a purpose.

光栄なことに、こうして作品のリクエストをいただく事が時々あります。
これからも期待に応えられるように…いや、期待以上の贈り物ができるように、自分を磨いていきたいと思います。
f:id:masanii_origami:20231006113724j:image
I'm honored that I sometimes get requests for origami.
I'll improve from now on, to be able to send gifts as expected, or even better than expected.

それでは、今日はこのへんで。
アトリエまさにぃで、またお会いしましょう。
That's all for today!
See you again in Atelier masanii:)

【参考図書/Reference】

はじめてでも組める くす玉おりがみ

https://amzn.to/3NTWEgP


ぷっくりかわいい!加藤眸さんの「フグ」+青い鳥/"Pufferfish" designed by Hitomi Kato, and Happy Blue Bird

アトリエまさにぃへ、ようこそ。
Welcome to Atelier masanii.
f:id:masanii_origami:20230928124357j:image
最近、20年来の親友が結婚するとの知らせが入りました。
お祝いの気持ちを贈りたいと私から申し出て、「とある品物」をプレゼントすることになったのですが…
な〜んか「ソレだけじゃつまらんな」と思って、新郎新婦にちなんだ作品を同封することにしました。
Recently my friend got married, I offered to give some congratulatory gift.
But I thought it's not enough and decided to make some origami works related to them.

お二人のプロフィールを見ると、新婦さんの趣味欄に「フグの飼育」とあります。
When I read their profiles, I found the bride likes to raise Pufferfish.

フグ折りてぇな。
I wish I could make Pufferfish...

しかし、そんなピンポイントな作品が世の中にあるわけ…
f:id:masanii_origami:20230928124413j:image
But does such a specific model exist...?

ありました。
折紙探偵団マガジン196号。
刊行は2022年11月。作者はなんと、先月のコンベンションでお世話になった加藤眸(ひとみ)さんではないか。
f:id:masanii_origami:20230928124421j:image
Exists.
Origami Tanteidan Magazine vol.196, published in Nov 2022. The creator is Mr. Hitomi Kato, who I met at Origami Tanteidan Convention last month!

こりゃ〜折るしかない。
久しぶりの作品レポ、いっちゃいましょう!!
f:id:masanii_origami:20230928124430j:image
There's no choice, let's begin!

☘️☘️☘️

とりあえず15cm普通紙で試作。
うん。
かわいいです!
思った以上に立体感があり、コロコロしてます。
おちょぼ口も良いですね〜!
そんなに小さくならない(=紙の使用効率が良い)のも嬉しいポイント。
f:id:masanii_origami:20230928124514j:image
First, I made a prototype with normal 15cm paper.
So cute!!
It has three-dimensional shape than I expected, and plump.
It's also nice that the completed size won't get that small (=Excellent usage efficacy of paper).

本番です。
お祝いの場にふさわしい素材は…
玉虫紙、これでしょう!
f:id:masanii_origami:20230928124523j:image
Try again.
The suitable material for celebration is...
"Tamamushi (Iridescent)"
It'll be the best!

必要な折り筋はしっかり付けつつ、おなか部分はシワ厳禁。
シンプルなぶん、ごまかしは効きません。
触り過ぎるとクタるので、手早くムダなくやるのが鉄則です。
さらに、完全な左右対称になるよう、所々で厳格にチェックを入れます。
While making necessary creases, on the other hand it must not be wrinkled on the body.
Simple models don't allow any compromise.
It distorts if the hand touches too much, so we must process quickly.
In addition, check the shape in every step strictly to keep it perfect symmetry.

仕込みでは、上下の紙をまとめて折るため、インコースアウトコースで誤差が生じやすいです。
これも計算に入れて、仕込みの段階では100%折らないのが私流。
工程18では、一気に折りたたむ前段階として「おさらい」があるので親切ですね。
ここで一斉点検をすると、あとになって歪みが出にくくなります。
f:id:masanii_origami:20230928124553j:image
While making creases tend to be misaligned because the multiple layers are folded at once.
Considering that effect, I don't fold firmly in advance.
In step18, there's kindnessly "Review point" in the diagram.
If you check the overall creases, it won't be distorted later.

これは他の作品の立体工程に言えることなのですが、折り終わったあとには、カドや輪郭が左右で完全に一致しているか確認しましょう。
中割り折り・かぶせ折りも同様です。
美しく折るための必須プロセスといえます。
This also applies to all other three-dimensional process.
After folding up, check that corners or outlines are aligned on the both sides.
"Inside reverse fold" or "Outside reverse fold" are no exception.
This is mandatory process to make the model beautifully.

工程41の立体化は、「太い一点鎖線」が見えないため、長い道具を使ってアタリをつけます。
このラインと図の山折り線が、垂直になればOKでしょう。
谷折り線は、そこから「下の輪郭と垂直」でキメました。
f:id:masanii_origami:20230928124607j:image
To expand the structure in step41, we can't see the true line given in the diagram, we have to estimate it by using something long.
This line should be right angle to the mountain fold line in the diagram. And valley fold line should be intersected the bottom outline perpendicularly.

さらに、このままでは反対側の折り目が逆向きなので、一度バラして折り筋を付け直します。
工程18の「おさらい」を自主的にやるわけです。
コレをやると折りやすいし、余計なシワも出にくくなるんですよね。
あとは大胆にベコッとやっちゃいます。左右の頂点を裏側からつついて整えたら、ようやくフグらしいフォルムが見えてきました。
f:id:masanii_origami:20230928124621j:image
And more, in this state creases on the back side are remained backwards. So I disassembled the structure and made the correct creases.
In other words, I did "Review" like step18 voluntary.
If so, I can fold easier and it the surface won't be wrinkled.
After that, just push it in boldly.
When I poked both sides from behind and adjusted the overall, Pufferfish shape appeared at last.

あとはテキストの指示どおり「フグらしく整えて」いきます。
永久保存を見越して、開きやすい箇所は入念に接着しました。
玉虫紙は和紙なので、表面がザラザラしています。ノリとの相性は抜群で、ぴったり貼り付いてくれるんですよね。
それにしても、おちゃめでかわいいクチビルだこと。
f:id:masanii_origami:20230928124639j:image
Then adjust according the diagram.
I glued the spot that tend to be unfold carefully, for permanent preservation.
Tamamushi is washi paper so the surface is rough. It has high affinity with a glue and sticks firmly.
By the way what a cute & charming lips!

ノリが完全に乾いたら、めでたく完成!
f:id:masanii_origami:20230928124645j:image
After the glue dried, completed!

作業場所がカフェだったのですが、カバンの中で潰れたら祝いの品が台無しになってしまうので…
結果、こんな感じでお持ち帰り。
f:id:masanii_origami:20230928124654j:image
I was making it at a cafe, it's awful if the celebratory items collapse in my bag.
So I took it home like this.

☘️☘️☘️

フグを作ったあとに考えました。
新婦だけじゃなくて、新郎のも必要じゃね?
I wondered after making Pufferfish.
The gifts are necessary, not only bride's but also groom's, right!?

新郎の趣味欄には「バードウォッチング」とありました。
私は彼がビールを片手に焼き鳥を食っているシーンしか見たことがありませんが、プロフィール欄に書くくらいだから本当なのでしょう。
I found that groom likes bird watching, in the invitation.
I only know the sight of him tasting Yakitori with beer, however it may be true since he wrote it on his profile.

よし、青い鳥つくろう。
Yes, let's make a blue bird.

採用したのは、2009年の折紙探偵団マガジン114号、宮本宙也さんの「文鳥」。
直前まで神谷本2の「小鳥」と迷いましたが、こちらは折ったのが随分前なので心配です。
文鳥なら2年前にしっかり折れたので、そこそこ自信がありました。
(2021/07/13)

masanii-origami.hatenablog.com

I adopted "Java Sparrow" by Chuya Miyamoto, listed in "Origami Tanteidan Magazine vol.114(2009)".
I was thinking about making "Little bird" designed by Satoshi Kamiya or not until the last minute, but I was worried because it has been quite a while since I had experienced it.
Java Sparrow, I could make pretty fine two years ago so I had some confidence.

素材は青ホイル紙35cm。
青い玉虫紙もあったのですが、厚みが出そうなのでパスしました。
ホイル紙の薄さを活かしてキリッと仕上げた方が、シルエットが美しい本作のデザインが引き立ちそうです。
f:id:masanii_origami:20230928124750j:image
The material is 35cm foil paper.
There was blue Tamamushi but I skipped because it'll be pretty thick.
This model's design that has a beautiful silhouette will be raised if I finish it sharply by using the thinness of foil.

もちろん、文鳥本来の色とは反転させて作ります。
折り図の見方がトリッキーになりますが、そこは頑張ります。
f:id:masanii_origami:20230928124801j:image
Of course I made it inverting the original color of Java Sparrow.
The diagram became a little confusing but no problem.

本作は工程数131の複雑系なのですが、これくらいのカテゴリーは折っていくうちにシワがどうしても付いてしまいます。特にホイル紙は顕著です。
それでも序盤から細心の注意をはらい、仕上げの際には可能な限りシワを伸ばしてあげました。
f:id:masanii_origami:20230928124810j:imagef:id:masanii_origami:20230928175837j:image
This model is complex category that has 131steps. Such ones inevitably gets wrinkled while being folded. Foil paper especially so.
Even though, I was careful from the beginning. And smoothed wrinkles when shaping the completed one as much as possible.

☘️☘️☘️

偶然にも、フグが同じインサイドアウト作品だったので、いい感じに釣り合う結果となりました。
あと、フグは「ふく=福」ということで縁起物なんですね(今知った)。
Unexpectedly "Pufferfish" was also included "inside-out" structure same as the blue bird, so both are well balanced as a result.
And I realized just now, the Pufferfish is auspicious.

そんなわけで、無事ふたつとも完成。
期日どおりに、メインの品物とともに送付することができました。
メインの品物も折り紙作品なので、またの機会にお披露目したいと思います。お楽しみに!
So you see, I completed both safely.
I could ship them with the main present on time.
By the way the mein present is also origami work, so I'll show you later. Don't miss it!

それでは、今日はこの辺で。
アトリエまさにぃで、またお会いしましょう。
That's all for today!
See you again in Atelier masanii:)

origami.jp

origami.jp


この記事をご覧になって「ためになった!」「今後も応援したい」と思った方は、ぜひページ下部から記事をご購入ください。
購入代金は全額、新郎新婦へのご祝儀とさせていただきます!!
※任意のカンパという位置付けですので、内容の続きではありません

If there is a person who was impressed and can support my works, purchase the article from the form below.
I'll donate all proceeds for the bride & groom as a gift.

※This means a voluntary donation, there is not a sequel.

この続きを読むには
購入して全文を読む