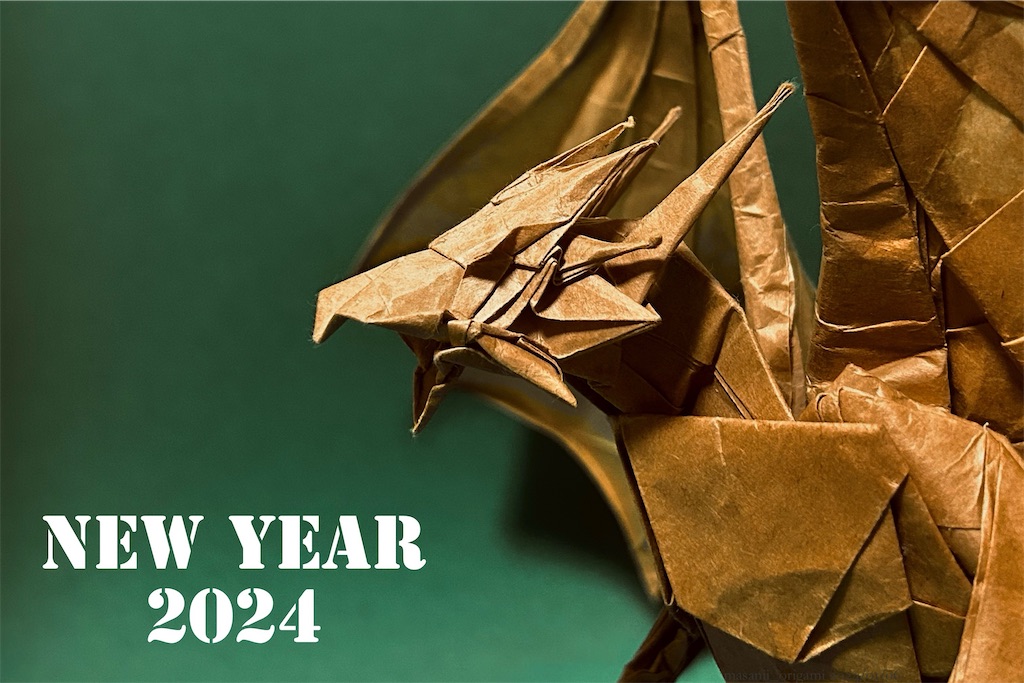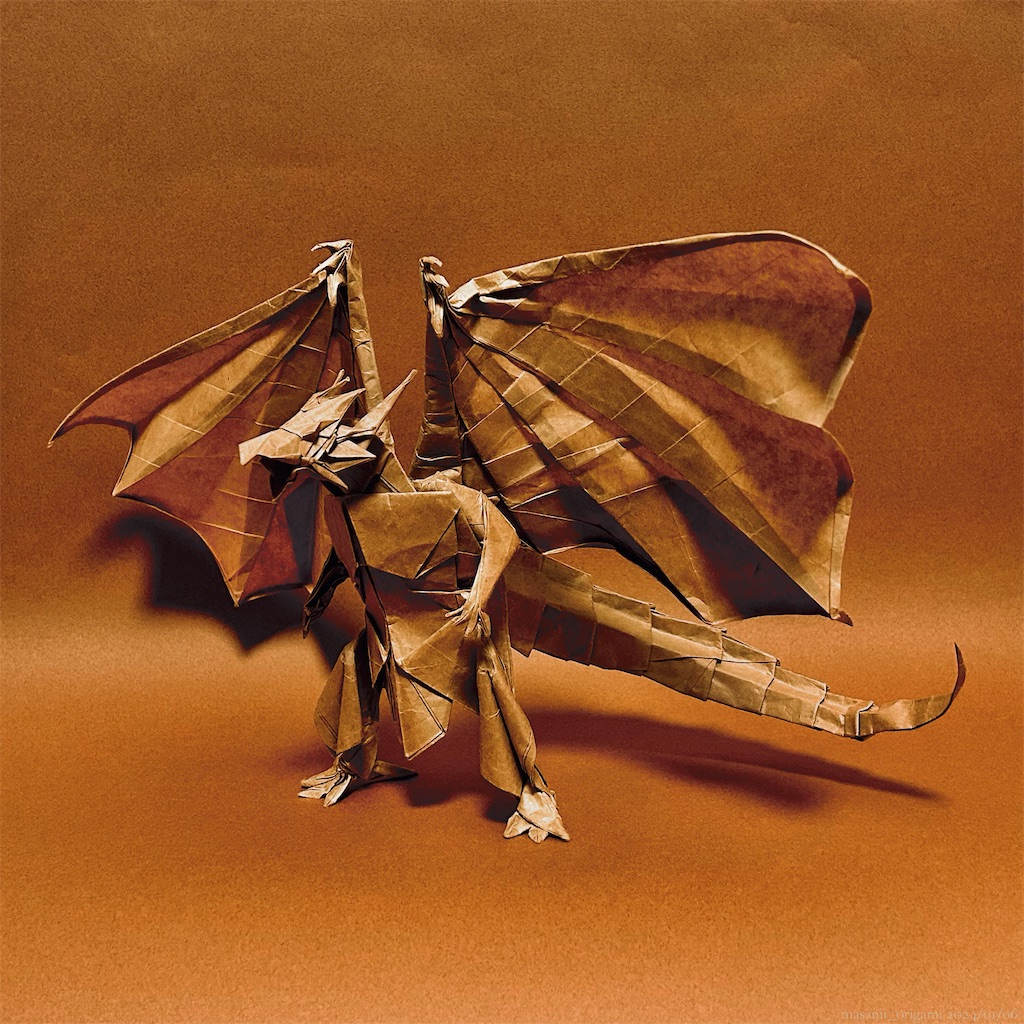
神谷哲史さんの「ディバインドラゴン(バハムート)」です!
"Divine Dragon (Bahamut)" designed by Satoshi Kamiya.
6月に途中写真を公開したきり、続きを報告しないまま、とうとう新年を迎えてしまいました。
とはいえ、辰年にドラゴンをお披露目できるのは縁起が良いですね(言い訳)。
It's been new year while I left my unfinished work from June last year.
Unexpectedly it matches the zodiac, that’s Okay.
各パーツのアレンジや蛇腹のノリ入れなど、事後加工もしっかり行い、満足のいく出来栄えになったと思います。
仕上げが難しいと言われるバハムートですが、自分なりの答えが出せた気がして嬉しいです。

Through shaping or gluing of each part, I could finish it to a satisfactory shape.
Though this model is known for being difficult to shape after completion, I'm proud that I could find my own answer.
アトリエまさにぃ、新年一発目の投稿です。
前回の続きから、完成〜仕上げまでのプロセスをお楽しみください。
This is the first post in Atelier masanii.
Enjoy the processes from the continuation of last time to completion & shaping.
☘️☘️☘️
前回の記事です。
工程190でストップしています。
ここから手足や両翼、顔の細部を作っていきます。
(2023/06/20)
masanii-origami.hatenablog.com
On the previous post, it was suspended at step190.
From here, I'll make hands, legs, wings, and face, etc.
まずはシッポ。
段折りを繰り返すだけですが、節目の寸法がズレやすく、左右対象に作るのは結構難しいです。
側面を山折りして立体的にしたあとは、ポージングのため横方向へ曲げていきます。
段折りの各層をナチュラルにずらすには、手先の感覚が頼りです。
入念にノリ入れして、ダブルクリップで固定すれば、あとは乾くのを待つばかり。
【Tail】
All I have to do is make pleats structures, but it's pretty difficult to make it symmetry because the dimensions of each joint tends to be misaligned.
After making both sides three-dimensional by mountain-folding, bend the whole tail sideways to shape the posture.
To shift each layer moderately, it relies on sense of my hands.
After gluing firmly and fixing by clips, wait until it dries.
手と指は大改造の末、リアルな形に仕上げました。
指の根本の位置や伸びる方向、カールの具合などの調整に手こずりましたが、理想的な形になったと思います。
【Hands & fingers】
I deformed a lot and finished them real.
Though I struggled to adjust the root position and direction of each finger, or curl degree, it finished in the ideal shape.
造形は、同じ神谷哲史さんの「エンシェントドラゴン」の手指を参考にしています。
(2020/04/15)
masanii-origami.hatenablog.com
I referred to the structure of "Ancient Dragon" also designed by Satoshi Kamiya.
足です。
経験者の方なら分かってくれると思いますが…
この作品、足の改造が一番のネックじゃないですか??
テキスト通りの状態では、指になるカドがピッタリ水平に重なっていて、左右に開くには強引にずらす必要があります。この作業、なかなか上手にできないんですよねぇ…
私は今回、構造そのものをタテ方向に変換することで、それぞれの指がパカッと広がるようにしました。
さらに、そのままだと細すぎるので、両サイドを膨らませて潰しています。
この方法も無理矢理ですが、オリジナルよりも指ざっくり割ることができます。
後ろの指もしっかり作れるので、シッポが浮いた状態でも立つほどの安定感を出すことができました。
【Legs】
An experienced players would feel so, in this model, shaping legs is the most difficult, isn't it?
According to the textbook, layers for fingers are stacked up neatly, so I have to spread them by force and always struggle.
This time I made each finger spread by switching the structure to vertical.
And more, it's too thin as it is, so I pressed after inflating both sides. This way is also forcible but I could divide each finger far apart. And I could make back fingers bigger, so it stood stably even without tail.
翼は、全体・ツメ・生え方の3つに分けて解説します。
①全体:フチを曲線に折ることで丸みを出しました。強度を保つために二重に折っています。
②ツメ:ずらし中割り折りで指の方向を変えたあと、力技で細くカールさせました。
③生え方:主軸をタテに曲げて強度を出し、フロントビュー優先で姿勢を整えました。
【Wings】
①Overall:I rounded it up by folding the edges along a curve. And I folded lines double to keep durability.
②Claws:After switching the direction of fingers by inside reverse fold with different degrees, bended thinly by force.
③Shape:I make it durable by bending the axis in parallel, and adjusted the posture focusing on front view.
主役の頭です!
全体のバランスを見ながら、ツノの太さや方向を整えていきます。
「目」は折る角度や深さよって印象が大きく変わるので、下にできる影がシャープな三角形になるよう意識しました。
口元(特に下アゴ)のポイントは、適度な尖り方と立体感、自然な開き方を意識したこと、それからフチを少し折り込むことで強度を出したことです。テキストからかなり逸脱しましたが、結果オーライです。
あとは、首のヒダにしっかりノリを入れて、顔の方向を定めればオッケー。
【Head】
While browsing the overall balance, adjust the thickness & direction of horns.
The eyes appearance are change depending on its degree and width, so I considered so that the shadows are sharp triangle.
While making jaw (especially in lower one), I considered moderate sharpness, three-dimensional effect, natural degree of hinge. And made it durable by folding the edge slightly inside. Finally it was deviated from the textbook, it's Okay.
After that, I glued the layers inside the neck firmly and adjusted the direction of head.
各パーツも大事ですが、全身のバランスも大事です。
ノリ入れをする層が、まぁ多いこと多いこと。
ダブルクリップで固定したまま放置、次のパーツにノリ入れ…これを延々と繰り返していきます。途方もない作業です。
固定を誤るとヘンなポーズになるし、自立しないのは論外。
正直しんどいですが、このプロセスの有無が作品の完成度を左右するので妥協はできません!
It's important not only each part but also the overall body balance.
There're too many layers to glue! Leave it while keep being fixed by clip, then glue next part... repeat that process, it's endless work.
It'll be unstylish if I fix in a wrong way, and too bad if it can't stand alone.
Actually it was so hard but I couldn't compromise, because the completeness depends on these process.
で、完成したのがコチラ。
どーん!!!!


Finally it completed, like this!!
☘️☘️☘️
実はちょうど10年前に同じ作品を作ったことがあり、写真がFacebookに残っていたので比べてみました。
うん、少しは成長したみたいですね。

By the way, I have made this model just ten years ago. So I compared my current work to the past post on Facebook. I wonder my skill has improved.
昨年11月の市民文化祭にも、なんとか間に合いました。
(2023/12/13)
masanii-origami.hatenablog.com
I was also in time for the exhibition held in November.
スタート当初の写真が2023/06/12なので、実に完成まで5ヶ月、公開まで半年も経ってしまいましたが、何とか完成品をお披露目できてホッとしています。
お付き合いいただき、ありがとうございました!
The first photo was took in 2023/06/12, so it has been five months to complete, ana six months to show you! Although, I was relieved to release that works. Thank you so much for watching!
☘️☘️☘️
さて、あれよあれよという間に2023年が終わってしまいました。
今年はどれだけの作品を折れるでしょうか。折紙講師講習会やコンベンションも、ボサッとしていたらすぐにやって来るでしょう。
2023 has gone while I was lazy.
I wonder how many models can I make in this year. Exciting origami events will come soon!
これからも世の中の素晴らしい作品をたくさん紹介できるよう、頑張りたいと思います。
アトリエまさにぃ、今年もよろしくお願いします。
それではまた!
I'll do my best to introduce wonderful origami all over the world, stay tuned, see you again in Atelier masanii:)
高雅な折り紙 | 山口 真 |本 | 通販 | Amazon
この記事をご覧になって「ためになった!」「今後も応援したい」と思った方は、ぜひページ下部から記事をご購入ください。
※任意のカンパという位置付けですので、内容の続きではありません
If there is a person who was impressed and can support my works, purchase the article from the form below.
※This means a voluntary donation, there is not a sequel.